Steps to creating an event:
How to create an event
If you are organising a physics event, such as a:
- Scientific meeting
- Talk or lecture
- Group event
- Workshop
- Conference
This step-by-step guide will help you create and publish your event to the IOP physics events page.
1 Name your event
Try to keep your event name short and descriptive. (This is a required field.)

2 Who is it organised by?
It is important to let attendees know who the event is organised by so they know who will receive their registration details. (This is a required field.)

3 Date and time
Enter the time and date for your event. The time should use the 24-hour clock and the date should be dd/mm/yyyy. (Only start time and start date fields are required.)

TIP: These first three steps (naming the event, organiser and date and time) are required. Once you have these fields filled in, you can save and publish your event and come back to fill in the rest later.
4 Event location
Search for or manually enter the venue details for your event. If your event is an online event only, eg a webinar, then select “Online Event” below.

TIP: If you don’t know the exact location of your event yet, then you can just enter a town or city.
When telling people about your event, you may want to include information such as:
- What your event is about
- Who the event is for
- Who will be speaking
- Catering details
- Schedule information
- Transport/parking options
- What will happen on the day
- Accessibility options
- Organiser contact details
- Images

6 Add tags
Adding tags will help people find your event. You should use keywords or phrases that relate to the event, such as:
- Type of event e.g. Lecture, Workshop etc.
- Speaker(s) at the event e.g. DrRichardSmart
- Organiser e.g. MerseysideBranch
- Keywords to describe your event e.g. NuclearPhysics, Radiation
- Co-sponsors

It is important to keep your tags consistant to help people find group or branch events more easily. Find a list of recommended tags for IOP branches and groups here.
TIP: Tags with multiple words should not include spaces e.g. TeachersConference.
7 Add an image for your event
This is probably the first thing your attendee will see so try to make it an eye-catching image that clearly shows what the event is about.
Once you have found the image you want to use, select “Upload an image” and locate it on your device photo library. If you want to change your image later, select “Update”.

We recommend using an image that is at least 2048x854px (1:2.4 ratio) and smaller than 10mb and in a .png or .jpg format.
REMEMBER: You must have appropriate copyright permission for your chosen image, such as it being your own work; having purchased an appropriate licence to use the image; or it being freely available under a Creative Commons licence. Here is a great place to find images under a CC license.
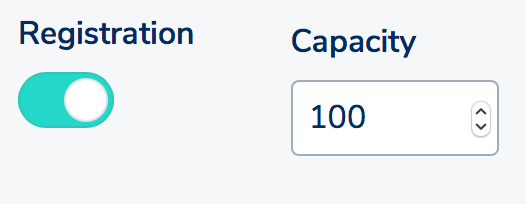
8 Enable registration
If your venue has limited capacity, you may want to enable registration. This will allow attendees to sign up for your event and guarantee a space.
To do this, ensure the registration switch is on, then specify the number of available spaces for your venue in the “Capacity” field.
9 Advanced settings
If you have already created an IOP conference or webinar event, you can add a re-route link that will take attendees straight from the event listing on the Discover Physics Events page to your IOP conference or webinar microsite.

TIP: This is for IOP conference or webinar microsites only.
10 Preview
You can preview your event to see how it will display when it is published by selecting the “Preview” button. When you’ve seen how it looks, you can select “Edit event” to return to the edit view.

11 Make event live
You can make your event visible to the public by selecting the “Make Event Live” button.

TIP: You can go back and edit your event at any point, even after it has been made live.
12 My events
You can view all the events you have organised by navigating to the “My Events” tab, then inside the “Organising” tab. From here you can view or edit your event. You can also check your event status (draft, live or cancelled) and see who has registered for your event.

13 Cancel an event
To cancel an event, head to the “My Events” tab and select edit on the event you wish to cancel. At the top of the page you will see an option to cancel the event.

Your event will still be listed on the Discover Physics Events page with the “Cancelled” flag, so people will still be able to find it.
TIP: Remember to contact your attendees if your event is cancelled or if any crucial event details have changed e.g. time, date or location.